BryanMcPhail.com

Professional software development, amateur BMW tinkering, old arcade game stuff

By

E31 Hydraulic hose failure

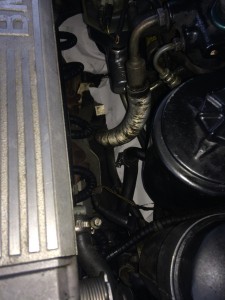
The horrible sound of a whining power steering pump alerted me to suspected low power steering fluid and indeed the area around the right side of the engine bay was very damp with a lot of fluid around the steering gear itself.

I put some paper above the steering gear and under most of the hydraulic pipes to try and narrow down whether the leak was the gear (very expensive!) or somewhere else.

hyd2

And eventually found this very unusual hose failure – it’s directly under the brake master cylinder so you can’t even see it from above.  Very fiddly to change out.

hyd

By

E65 wheels on E31

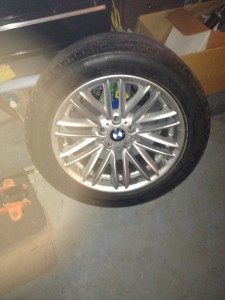
When some good condition E65 18″ wheels came up locally with nearly new tires it seemed a good bargain, and would hopefully cure some rear vibration where I suspected a problem with one of the rear wheels.  They are ‘style 94′ and came as standard on many E65/E66 cars.

tire1

I knew plenty of other E31 owners run 18″ wheels, and I know the center bore (72.6mm) is identical between E31 and E65, as is the bolt pattern (PCD 5×120) so what could go wrong?  Well, I completely forgot about the tire aspect ratio!  The new wheels & tires simply did not fit in the space available under the mount for the spring.  Where did I go wrong?

The old tires are 235 45 17 – that means 235mm width, 17″ inch wheel and 45% sidewall aspect ratio.  In other words the side of the tire is 45% the width.  So if we convert that 17″ to mm (431.8) and multiply the sidewall by 2 for top and bottom we end up with:

(235 * 0.45) * 2 + 431.8 = 643.3

The new wheels are 245 50 18 – so if we convert 18″ to mm (457.2) we get:

(245 * 0.5) * 2 + 457.2 = 702.2

So that’s a difference of almost 59mm – no wonder it didn’t fit!  In fact the clearance available is more like 10mm.  It’s worth noting even if it had fit running a vastly different size like this would have upset the speedometer as the rolling radius will be different, and could potentially confuse DSC/traction control as it too will find the electronically measured rotation is different from the physical one.

So this meant different tires, a good online calculator for working out sizes is http://www.rimsntires.com/specs.jsp

tire5


So by switching to 235 40 18 tires the overall height is now within a millimetre of the original and all is fine.  It’s also worth mentioning the ‘offset’ of the wheel – this is the distance from the hub to the mounting surface of the wheel.  You should always be able to find this stamped on the inside of the rim – for the E65 wheels this is 24mm – the E31 spec is 15mm-25mm so it’s just inside!  If the offset is greater than 25mm then the wheel would not clear the strut body, but a spacer could be fitted to compensate for this.

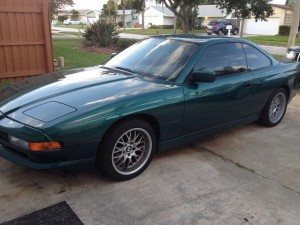
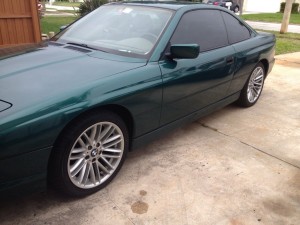
Old and new pictures:

tire3 tire4

By

E31 alloy wheel refurb

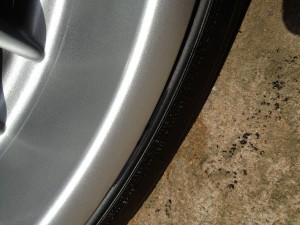
No real alloy damage to my wheels but the finish on the fronts was quite poor, cracking and discoloured from brake dust that no amount of cleaning will remove.  Decided to try some DIY…

1

First up, wash wheel as much as possible!

9

Apply some putty where needed and sand down with a mix 600, 1000, 1500 and 2000 grit sandpaper.

11

I didn’t want to remove the tyre so I carefully taped around the alloy, and then a blast of primer.

17

Two things above – the first primer seemed to react slightly with the putty – I tried a different primer and it was fine though.  The stage also really showed up bits where my putty finish wasn’t smooth.  If I had more patience I would have done another putty pass here.  But I don’t.

Loads of coats of bright silver with some rubbing down and sanding in between, then a full can of clear coat.  It was quite hard to get consistent paint coverage on the inside of the spokes.
21

Leave overnight to dry!

Then some polish and a lot of wax to hopefully stop brake dust from sticking to it.  Comparison against the other front below.  Up close you can see it’s not a professional job, next week maybe I’ll have another pass on it, with more putty work, and much more clear coat.

4

But when you aren’t up close, it really looks pretty good :)   Very pleased with it for first attempt!  Took about 5 hours though and still got 3 wheels to do (Luckily the rears are pretty good already so they will be easier).

99

4

3

By

E31 Lower Control Arm

Already documented elsewhere on the internet, but more pictures never hurt!
Problem – clunking sound over bumps from right side of car, visible damage to both ends of control arm.
Posted Image
Posted Image
Do NOT follow the official BMW instructions for changing this arm as they’ll have you take the entire strut out to gain access to the bolt on the ball joint.  Not necessary.  Instead remove the 3 bolts screen in the above picture and then you can push this lower part (attached to upper arm, lower arm and steering) down to gain access.  These bolts are pretty tight so I cracked them open with the wheel on the ground.  19mm bolts.  It never hurts to spray penetrating oil everywhere the night before either.
Posted Image
Now you can access the bolt on the ball joint end.  Break out the ball joint tool..
Posted Image
And if you’re lucky it will come away surprisingly easily!  I was expecting this to be a major problem as the upper ball joints took me days literally – very little tension was required here – no heat required, no 4 ft sledgehammer.
Posted Image
Posted Image
Posted Image

 The bushing end of the old arm was clearly destroyed, but the ball joint was surprisingly perfect despite the boot being badly damaged for quite some time.  Note that you can’t buy a new bushing for this arm anyway – the whole assembly needs replaced.  Perhaps because this arm is aluminium and pressing in a bushing could easily damage it.

Reassembly is just reverse of above!

You may have heard about having to do the final torque on control arms with the full weight of the car on the ground so the bushes are stressed properly.  You don’t need to that here as the E31 arm has a special spherical bearing, it’s not just a regular bushing.

Should you get an alignment done after this?  Probably, I haven’t so far…  the car was aligned very recently and I don’t see that the alignment will have changed much – I’ll get it checked soon.

Should replace both arms in pairs?  A lot of people will say yes, but there’s absolutely nothing wrong the other side – bushing and ball joint in perfect condition with no play so I don’t plan to do this.

By

E31 Front Roll Bar Bushes

Easy job!  Frontend on ramps, just undo the 2 bolts on each side, support the bar with the jack, then just swap the bushes.
You can see the old ones where in pretty good condition, but as it’s only $4 for the bushing no harm in putting in a new one.
Posted Image
Posted Image

By

E31 Front Shock Replacement

Front right knocking noise continues over any kind of bump, quite loud inside the car!  The destroyed bushing on the lower control arm may have contributed to the noise, but clearly not the primary cause as with that replaced the noise is still there.  If anything it’s got worse over the past weeks.  Upper arm is new, steering rods are new, lower arm is new, roll bar link is new, roll bar bushings are new.  Bolts on the x-bar attached to the frame are also tight.  This doesn’t leave much – the top mount and the shock absorber.  The top mount certainly seems good as when the lower arm was out the strut was held on only by the top mount and there was no play in it.  Sadly that leaves the shocker and pushing down on the car a definite knock could be felt in the strut tower.  The shocker absorber itself definitely ‘feels’ fine as it’s extremely hard to push down (sports suspension!) and equal to the other side of the car.  Absolutely zero pitching under braking.

So the plan is:

1:  Leave some penetrating oil on the top nuts and collar nut overnight to help get them off
2:  Jack up car somewhat and loosen collar nut with some weight still on the strut.
3:  Remove wheel, disconnect ARB link, remove 3 top bolts and push strut down and pull out from car
4:  Apply spring compressors (heavy duty ones loaned from auto-zone!) then remove top nut once pressure is off the top mount.
5:  Unscrew shocker fully from strut, then replace in reverse order!

Posted Image
Posted Image

However, the plan changed at step 2 – I was relieved to find the collar nut turned very easily with my £2 pipe wrench!  I expected getting this off to be the hardest step.  It turned a little too easily though..  as it also tightened very easily…  And tightened further..  Yep, this was not tight at all and my sound was the strut insert literally bouncing up and down inside the strut :(  Shocker absolutely fine.  Tighten it up and a test drive later and all is confirmed well!  I never even thought to test this before, I just assumed it would be super tight.

New plan:

1:  Return spring compressors to shop in rattle free car
2:  Return unused Bilstein shock for credit!

By

E31 Flashing Srs (Airbag) Light Repair

Problem – SRS light on dashboard continually flashes.  Did so since the day I bought the car!

Diagnosis – CarSoft reported error with front left sensor.  Clearing error via carsoft made no difference.

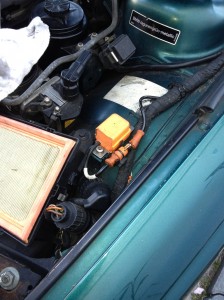
There are but two sensors, plus the airbag module itself, for 1993 model year.  The plastic was very brittle and the connector disintegrated straight away!  (Orange part in picture – airbag parts and connectors are always orange on this car and most BMWs I think for easy identification).

IMG_0948

Attempt 1 – substitute sensors from my 1989 750iL which I very stupidly removed without disconnecting the battery first so now the SRS light is flashing there and carsoft won’t talk to the 1989 module… Sigh.  Carsoft on the 850Ci gives the same error as before.

Attempt 2 – swap the left sensor onto the right and vice versa – should have done this instead of step 1!  Carsoft still gives same error.

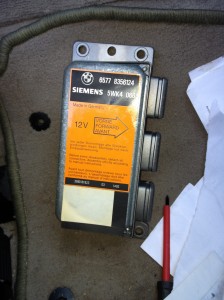
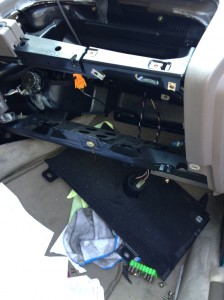
Therefore suspect the wiring is at fault or the module itself…  Module errors seem very very rare as I couldn’t find any other forum posts about them.  The module is located under the passenger side glove box which needs removed and even then access is very awkward it’s recessed up and hidden by another module (or two depending on options).  The wiring looks ok – and to test it end to end I’d have to access the module anyway, so time to take a chance on a new module…

You can buy them for $900 new, or Ebay from between $20 and $80 depending on whether you have single or double airbag version.  Check the part number!  Of course I went for the Ebay one.

IMG_0952IMG_0949

The official E31 service manual gives good instructions for removing the glovebox and associated pieces.

And the usual advice - disconnect your battery (or batteries for most E31′s) before working on any airbag parts!

So new module plumbed in – reconnect batteries – turn on ignition – flashing light still there :(

However, after a period of annoyance I checked with Carsoft and different error codes were present – clearly ones from the donor car which had probably been powered up with disconnected sensors and logged the fault.  Cleared those codes, and flashing light gone – everything working fine now!

By

E31 performance chips

I ordered a set of 3 chips from Ebay – $90. Cheap for chips I know, but I assumed it was clearance of old stock as I doubt there is much demand for M70 engine stuff nowadays. In retrospect I suspect this is really a ‘pirate’ set consisting of a copy of eprom data developed by someone else. The set has 3 chips – 2 for DME (engine) and 1 for EML (gearbox).

But anyway.. being a nosy sort first thing I did was to read the chips on my PC as I have an eprom reader for old arcade stuff. I also found a stock ECU chip image floating on the internet, comparing the two revealed clear changes in the ‘map’ area of the chip, and no changes in the ‘program’ area. That’s good as the chip seems ‘legit’! However, problem suspected with the 2nd DME chip – I couldn’t get a consistent read from it – for the technical folks the top data bit seemed to fluctuate (and yes, pins were clean), which changes random bytes in both the program and maps. That’s real dangerous to put in an engine! I am 99.9% sure the seller sent me a bad chip, it’s a good I thing I had the capability to check & verify what was I doing.

Other sites have a good guide to removing the ECUs:

http://www.wokke.de/…nstallation.htm

http://www.meeknet.c…pping/Index.htm

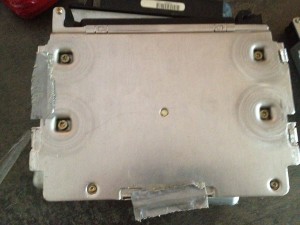
My car has the ’352′ DME which is different from the one mentioned in the links. Here you do NOT need to undo any torx screws – they only hold the pcb to the case, not the case to the lid. (I found this out afterwards of course). You only need to prey apart the metal clips.

ecu1

But.. why is my DME held together with silver sticky tape!?

ecu2

Seems a previous owner has been in here before!

ecu3

And that hardly looks like a factory spec chip!

So seems my car was previously upgraded.. I read these chips too and it’s a different map to stock and the one I was sent.

Difficulty – pretty easy to remove ECU’s and swap chips, but be careful!

(Update : After getting a replacement for the bad chip I ultimately went with the new chips as they ‘felt’ a little better than the old).

By

E31 power steering fluid CHF11S

A previous post talked about the replacement of the brake booster pressure accumulator.  The possible reason for the failure of that component became apparent when I examined the power steering fluid (the same pump/fluid drives the brake booster as well as steering and if present self levelling rear suspenion).

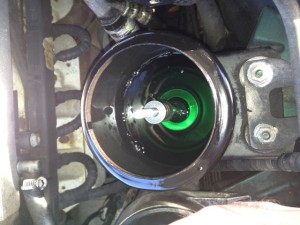
It’s red!  Most likely a previous owner/mechanic dumped regular ATF in there rather than CHF hydraulic fluid.  There’s a good chance this damaged the pressure accumulator diaphram over time.

red

CHF11S should always be a strong green colour, as should the older CHF7.1 used in the E32.

green

By

E38 DSP compatible MP3 player

At the time I made a detailed forum post on this subject, but it seems to have disappeared, and all I have left are the pictures so the details are a little hazy.  In short, yes, you can easily fit a MP3 player to a BMW DSP system and have the steering wheel controls work, etc.

You can easily find BMW-aware mp3 players on Ebay – these effectively replace the CD changer – so the front-of-car commands for CD change, skip track, etc, are routed to the new device.  The device plugs into the radio module to gain access to the i-bus as well as the audio lines.

mpx

So what’s the problem?  If your car is fitted with the high-end DSP amp then you’ll find you get no audio output with these devices!  That’s because with the DSP setup the amp takes a digital optical signal from the CD changer directly, and the analog inputs are ignored.  There’s no easy hack around this – if you try to patch into say the cassette or radio audio you’ll find the controls don’t work – because the system knows what system is active and what control signals should be passed.

The solution is to add an analog-to-digital convertor into the mix, so that the amp can be supplied the digital format it expects.
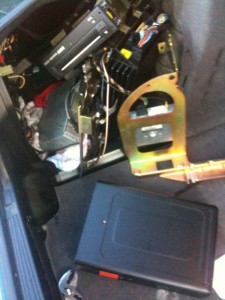
mp1

To install the mp3 device itself you need access to the radio module which is right at the back underneath the padding – you really have to remove everything to access it properly – CD changer, amp, video module, GPS…

mp2

With the mp3 in place you have to cut out the analog signal wires from the mp3 devices and attach these to the ADC input.  I can dig out the pinouts if anyone needs them.
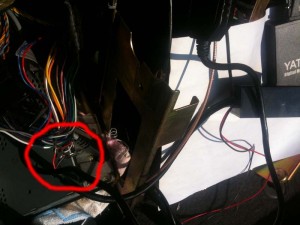
mpxx

Then you need to find power for the ADC.  There are a few places you can tap it from but as my car was pre-wired for the phone module but it wasn’t fitted I tapped it from the phone connector.  This meant it was on its own fuse in case anything went wrong.

mpp

You can google the exact phone pinout – but brown and pink are what you need!

With the ADC powered up everything worked perfectly!  Sound quality was absolutely fantastic through the DSP.