Mercedes S500 W220 Fuel Injector Replacement DIY
Repost of article written for FCP Euro
This time around we have a W220 chassis Mercedes S500 with a very obvious misfire – the engine was clearly bouncing around on its mounts! Checking diagnostic codes should always be the first port of call in this kind of situation. Here two codes came back P0205 and P0305. P0305 is misfire on cylinder 5, and P0205 is fuel injector fault on cylinder 5. That’s a good starting point, so let’s dive on in.
OBD-II Diagnosis
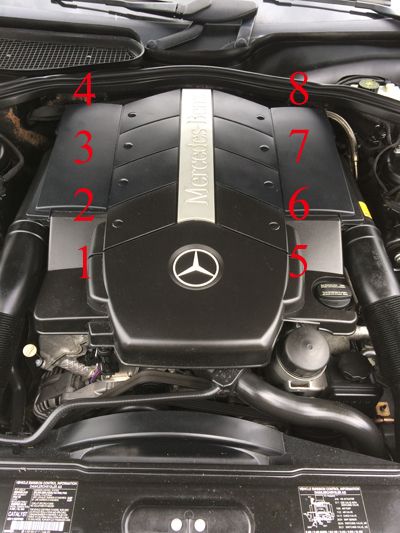
The engine cover is in two parts – pull the front part towards you, then lift the larger part from the rear and it will pivot forward. Which is cylinder 5? I’ve drawn out the cylinder order in the picture to the side, but as a general tip it can be worth double checking information on the internet. In a case like this manually disconnect the fuel injector wiring on the suspected cylinder and then restart the engine and re-read the codes. If the P0205 code persists then you know you have the right cylinder – if you get a P201 code then you know you must have disconnected cylinder 1. Always worth double checking before doing the work and not realizing the error until everything is reassembled.
The fuel injectors are all attached to a common fuel rail that stretches around the engine. Even with the engine off there can be significant pressure in this rail, so we need to depressurize it before working on the system. The ‘official’ way is to attach a hose to the Schrader valve on the rail and the fuel will squirt into a container of your choice. The more DIY mechanic way would be to remove the fuel pump relay (fuse box under right rear seat) and then just start the engine. Obviously the existing fuel in the rail will be sucked out and no-more can be supplied from the pump leading to an engine stall after a few seconds.
Getting to the injectors
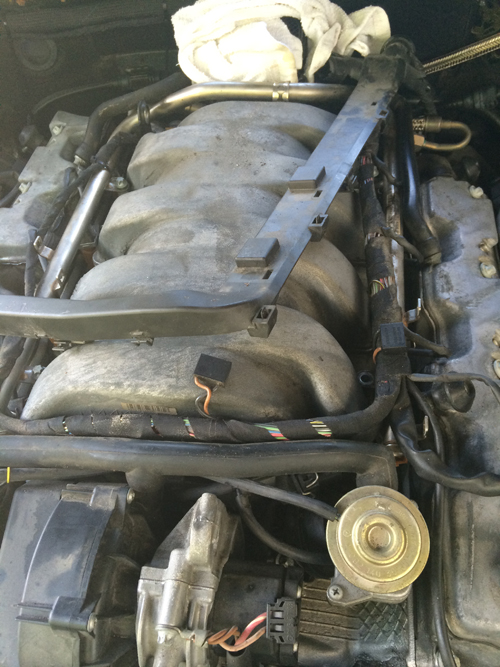
Next up is the wiring loom – this is in the way of us removing the fuel rail. Luckily we don’t need to actually unplug anything in the wiring loom (apart from the fuel injectors themselves) – it is sufficient to remove the loom from the plastic shroud and then there is enough slack to move the loom out of the way. This is just a simple matter of unclipping the shroud with a flat head screwdriver – plus a single 8mm bolt at the rear. You may also have to cut some cable ties if they are present. With the shroud out of the way the 4 E30 (External Torx) bolts holding the fuel rail to the manifold can be removed . The only thing holding the rail onto the manifold now is the pressure from the o-rings around the fuel injectors. Before the rail is removed, clean the area around the injectors as much as possible – even just spraying a few cans of carb cleaner everywhere to displace any dirt. The last thing we want is any dislodged dirt or grime to fall into the fuel injector holes. Next gently lift up the rail trying to keep equal pressure on all injectors at once. It should pop out of place.
Unclip
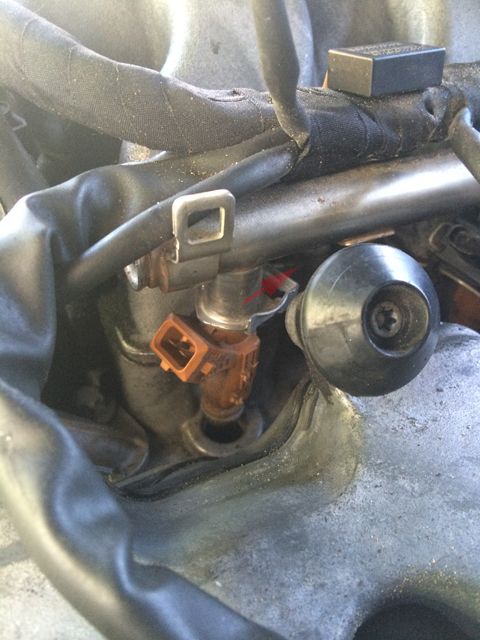
Now unclip the injector by pushing the little clip in the direction shown – the injector can now just be pulled out with downwards force as only the o-ring pressure is holding it in. If you are not replacing all eight injectors with brand new ones then consider at least replacing the complete set of lower o-rings. Lubricate all o-rings with some engine oil and then reassemble in reverse order. Before replacing the engine cover be sure to start the engine and make sure you can’t smell or see any gas leaking around the injectors. Any leak is probably from a damaged or old o-ring.


Recent Comments