BryanMcPhail.com

Professional software development, amateur BMW tinkering, old arcade game stuff

By

E31 M70 Alternator Replacement

Replacing the alternator on a V12 – this sounds a bit daunting, but is actually a fairly simple job!  The main advice I want to give though is DO NOT listen to the official service manual.  It has all sorts of steps that I found to be completely unnecessary, such as fully disconnecting the oil filter assembly (why??), the underside splash guard or installing the alternator without the pulley and then attaching the pulley in-place (surely you have hardly any room to work with that method).  Therefore I expect the official dealer ‘book time’ for this job could be fairly expensive.

I done this job working purely from the top of the car never had to do anything from underneath, except maybe push the plastic cooling tube back on when re-assembling.

Basically just strip down parts for access:

Fan (don’t need a special tool to remove it – a wedged 7mm spanner on the small nuts will prevent it turning whilst you turn the 32mm spanner on the main nut)

Radiator shroud and expansion bottle – unfortunately you will lose some coolant as I choose to fully remove it rather than just try and wedge it out the way.  I put some bubble wrap over the radiator to protect it in case I accidently struck when working on other things.

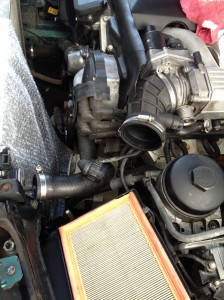
Right side MAF and air box top as pic.

Disconnect radiator top hose at radiator end – you don’t have to disconnect other end if you don’t want to, there is room just to push it out the way.

You may have to disconnect the transmission oil cooler line (right underneath radiator hose) and right side rotor just to get some wiggle room.  Can probably do it without but just gives a bit extra room to work with.

Then detension the belt at the tensioner.  At this point you can just undo the bolts on the alt and tensioner.  You can then tilt the alt forward to give you room to disconnect the two cables at the back.  Then just lift it up and out!


IMG_0960

IMG_0942

Re-assembly is reverse of above.  I also cleaned & filed the electrical ‘spade’ connectors as mine were a bit corroded and double checked the main cable was not shorted at any point (eg, in the metal tube it goes through to get to the jump start point).  Mine was just fine.

Replacement alt was only $112 plus $46 core from Autozone (US) – which seems pretty good value.  Lifetime warranty.  Back to a solid 13.6V with the car running :)

By

E31 Brake Bomb! (Pressure accumulator)

Problem – overall brake performance not great, ‘nothing happens’ for half a second when you want to brake hard.  Not good for emergency stops!  Car has been like this since I got it, new brake pads didn’t help much.  Brake discs are ok.

Suspected culprit – the brake booster pressure accumulator.

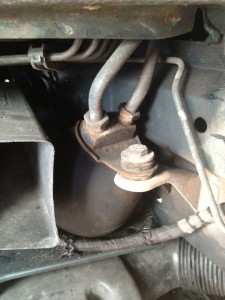
Accessing it is super easy – remove front left wheel, remove wheel well trim pieces (8mm bolts), and you can see it.  Before going further pump the brake pedal to get as much fluid out.
bomb1

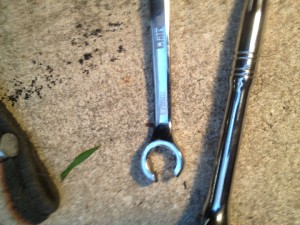
You need a 17mm ‘c’ wrench to undo the pipes – they are pretty tight and because the bomb is mounted on rubber bushes it’s hard to get good torque on them.  I took them by surprise by giving the wrench a good whack with a sledgehammer(!) – worked perfectly :)

17mm

Two 1/2″ nuts are used for the mounting, these were not tight and easy to get off.  Just pull hard on the air duct to remove it and you have easy access to the rear one.

The obligatory shot of the new piece:
bomb2

Now just pull the pipes, not much fluid should leak, swap the rubber bushes over, mount the new piece, replace the trim.  Top up fluid if required (power steering reservoir).

Results – was looking good soon as I started the car – pedal was smooth and not hard like before.  Jabbing the brakes at 20mph like I did before resulting in the ABS kicking in and the car pretty much stopping on the spot (or so it felt ;).  Braking performance is now absolutely fantastic – clearly how the E31 is meant to brake!

Difficulty – very easy.
Cost – pricey – $290 is the cheapest I could find the piece versus $360 dealer list price.  It seems in the past few years the piece has got very expensive as forum posts from a few years ago talk about it being sub $100.  Because it’s pressurised nitrogen these days you can’t ship it by air either and some places won’t even mail it!

By

E31 Air Intake Boots

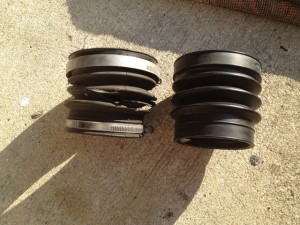
The E31 air intake is more complex than other models.  From the top of the engine bay you can see the rubber boots on each side joining the air filter boxes to the pipework.  However, there’s another boot on each side after this connecting the air ducts to the pipework.  You can barely see it from above, and replacing it is probably a bumper off job!


boot2


boot1

The replacement piece was very cheap at $6 so I replaced it even though I doubt there was any real problem caused by the rip.  The bumper was already off – I didn’t remove it just for this!