Old school shadow map method
Cascaded shadow maps have been the de-facto choice for games for many years, certainly for most of the PS3/Xbox 360 era and a few titles before that. However, CSM has never been perfect, far from it, the biggest problems are it uses a lot of memory as to get good quality shadows on a 720p screen you generally need the biggest cascade to be a 2048×2048 texture, or 4096 for 1080p. Many meshes will be present on multiple cascades, so you have a heavy draw call cost. When rendering the shadow objects, in order to smooth the shadow edges you have to make a lot of samples in order to perform a blur (my current PC engine has quality presets for shadow samples count from 25 to 81 per pixel based on blur kernel size).
Now on PS4/Xbox One/PC that’s all fine, it’s still the best overall choice, but on low to medium mobile and on devices like the 3ds, you may end up with quite low visual quality when you scale back the buffer sizes and samples for performance reasons.
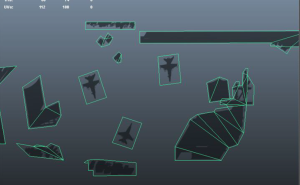
An alternative method I used on Hot Wheels Track Attack on the Nintendo Wii and several subsequent Wii and 3ds games was a top down orthographic shadow projection. For prelit static shadows a mesh is created by artists in Maya with the shadow/light maps as textured geometry. Solid vertex coloured geometry is also possible. This is rendered to an RGB buffer in-game, initialized with a white background, from an orthographic camera pointing straight down around the area of interest. The dynamic objects can then reference this texture using their XZ world positions only and multiply the texture RGB against the object output RGB. This sounds pretty crude, and it is! However, the Wii and 3ds don’t have programmable pixel shaders so it was important the shadow method could be achieved in their fixed function pipelines.
Crudeness aside, you can achieve really high quality shadows onto dynamic objects with this method because you can not only pre-blur all your shadows and bake them at a high resolution, you can use coloured shadows (for example, light cast through coloured glass). It’s also very cheap to light particles with this method. You can mix dynamic objects with static by also rendering the dynamic objects to the buffer after the static, or by having two buffers and merging them later. You can also aim for a very low number of draw calls, especially by merging and using texture atlases in the art side.
There are some clear downsides to this method – there is no self-shadowing, so an object can never cast onto itself, there are also artifacts on vertical surfaces as the Y component is ignored in the projection so essentially you a get a single sample smeared all the way down. You also have to be careful of the height (in Y) that you position the ortho camera at, if any objects pop above this level then will be incorrectly shadowed. If using multiple buffers (perhaps per object of interest) be aware that render target changes can be expensive on PVR type hardware (iOS).
As always though graphics is about trade-offs and in some applications you might still find a use for this technique, especially fast moving games.

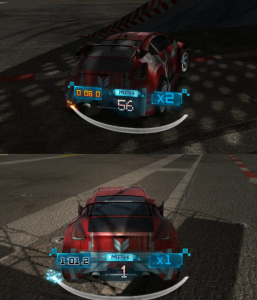
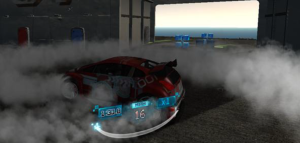
Tech Demo (2011). A small 512×512 shadow buffer is used for the car but the final visual quality is high. Also note that despite the XZ projection, Y artifacts are barely noticable


Recent Comments